How to Propagate Japanese Maples From Cuttings
Propagating Japanese maples from cuttings is a gratifying endeavor for both novice and seasoned gardeners. It offers a precise way to replicate your favorite maple tree, preserving its unique characteristics.
Unlike growing from seeds, which can yield unpredictable results, cuttings retain the genetic traits of the parent plant. With a little patience and attention to detail, you can enjoy a thriving collection of Japanese maples in your garden.
Identifying Suitable Japanese Maple Varieties
Japanese maples, known for their graceful beauty and striking foliage, are a beloved addition to any garden.
If you’re eager to propagate these exquisite trees from cuttings, the first step is to identify the most suitable Japanese maple variety for your gardening needs. In this section, we’ll explore different Japanese maple varieties and help you choose the right one for your propagation project.
Popular Japanese Maple Varieties
- Acer Palmatum (Japanese Maple): This is the quintessential Japanese maple, famous for its intricate, palm-shaped leaves and a wide spectrum of colors, including vibrant reds, greens, and mesmerizing variegated patterns. It’s a versatile choice for both novice and experienced gardeners.
- Acer Japonicum (Fullmoon Maple): Fullmoon maple varieties boast larger leaves compared to other Japanese maples and offer a brilliant display of colors during the fall. Their rich autumn foliage makes them a picturesque addition to any landscape.
- Acer Shirasawanum (Shirasawa Maple): Recognizable by its almost perfectly round leaves, this variety is highly sought after for its exceptional fall foliage display. The leaves of the Shirasawa maple transform into vivid hues of red, orange, and gold, making it a stunning option for your garden.
- Acer Palmatum Var. Dissectum (Laceleaf or Weeping Japanese Maple): This variety is treasured for its delicate and lacy foliage, which often cascades gracefully like a waterfall. It comes in a wide range of colors and is perfect for adding a touch of elegance to your garden.
Choosing the Right Variety for Propagation
Selecting the ideal Japanese maple variety for propagation is crucial to ensure a successful and visually appealing garden. Here are some considerations to guide your choice:
Climate Compatibility
Different Japanese maple varieties have varying temperature and climate preferences. Consider your local climate and choose a variety that thrives in your region. Some may tolerate heat better, while others prefer cooler conditions.
Soil and Sunlight
Evaluate your garden’s soil type and sun exposure. Japanese maples generally prefer well-draining soil with a slightly acidic to neutral pH. They thrive in dappled or filtered sunlight, making them a great choice for gardens with partial shade.
Space and Size
Think about the available space in your garden. Some Japanese maple varieties remain relatively compact, while others can grow quite large. Ensure you have sufficient room for the mature size of your chosen variety.
Aesthetic Preferences
Consider the aesthetic appeal of the Japanese maple variety you select. Different leaf shapes, colors, and textures can add unique character to your garden. Choose one that resonates with your personal style and complements the overall design.
Preparing the Cuttings
Preparing the cuttings is a pivotal step in successfully propagating Japanese maples from cuttings. It’s all about choosing the right branches, making precise cuts, and ensuring your cuttings are in the best possible condition for rooting. Let’s dive into the details of how to prepare your cuttings effectively.
Selecting the Healthiest Branches
When it comes to selecting branches for your cuttings, the health of the parent tree is your guiding light. Look for branches that exemplify the following characteristics:
Maturity: Opt for branches that are not too young, as they may not root well, but also not overly woody, which can be challenging to root. Ideally, choose branches that have experienced recent growth during the current season.
Disease-Free: Inspect the branches for any signs of disease, stress, or damage. Healthy branches are more likely to lead to successful propagation.
Non-Flowering: It’s best to select branches that have not yet produced flowers or seeds for the season, as they are in a better state for rooting.
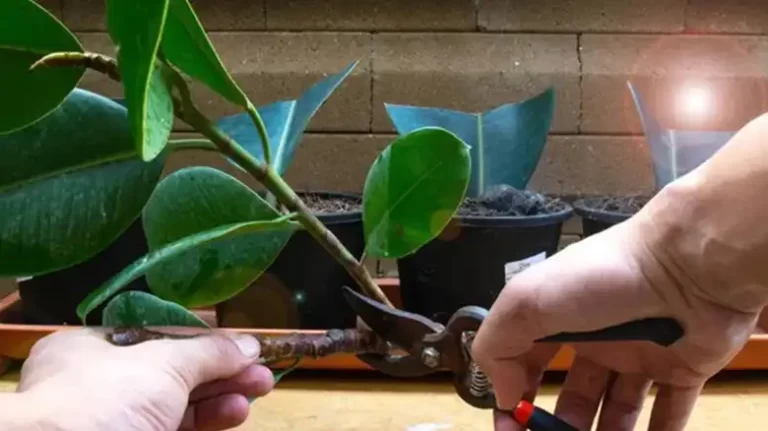
Preparing the Branch for Cutting
Once you’ve identified the ideal branches, it’s time to prepare them for cutting. This involves specific steps to ensure the best chance of success:
Tool Selection: Start by making sure your cutting tools, whether pruning shears or a sharp knife, are clean and sharp. You can sterilize them with rubbing alcohol to prevent any potential transmission of diseases.
Choosing the Right Length: Cut the selected branches into sections that are roughly 4-6 inches in length. The cut should be just below a node, which is where leaves or buds attach. Nodes are crucial as they are where roots will eventually form.
Leaf and Bud Removal: Trim away any leaves or buds from the lower half of the cutting. This serves two purposes: it reduces moisture loss and encourages root development.
Hormone Application: Although not mandatory, applying a rooting hormone to the cut end of the branch can significantly enhance the chances of successful rooting. Follow the product’s instructions for usage.
Final Cut: Make a clean, diagonal cut just above a node at the top of the cutting. This encourages new growth at the top while preventing drying and potential disease at the cut site.
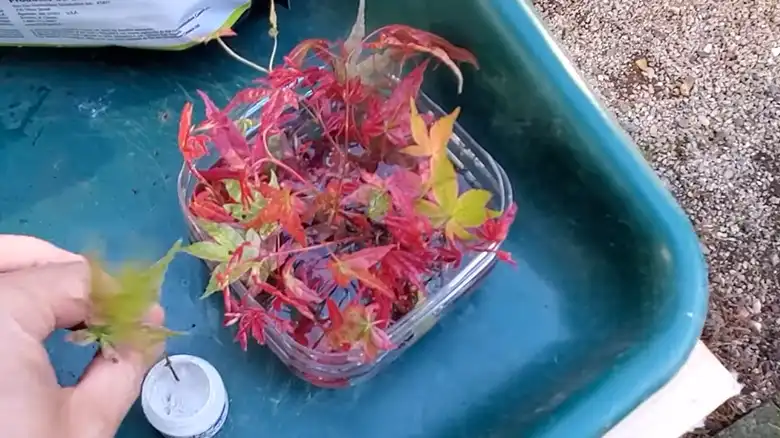
Storing Cuttings
Proper storage of your prepared cuttings is essential to keep them healthy and ready for the next phase of the propagation process. Two main storage methods can be employed:
Keeping Cuttings Moist
For short-term storage, you can keep your cuttings moist by wrapping them in a damp paper towel or placing them in a plastic bag with a moist paper towel. This method is ideal for a few days at most.
Using a Plastic Bag
If you need to store your cuttings for an extended period, placing them in a plastic bag is the way to go. Be sure to label the bag with the variety and date to avoid confusion. Store the bag in a cool, dark place, such as a refrigerator.
However, remember that the longer cuttings are stored, the less viable they become, so aim to plant them as soon as possible for optimal results.
Caring for Your Cuttings
Taking care of your Japanese maple cuttings is a vital part of the propagation process. These young plants need special attention to ensure they develop strong roots and eventually grow into beautiful, mature Japanese maples.
In this section, we’ll guide you through the crucial steps to provide the care your cuttings deserve.
Environmental Considerations
When it comes to caring for your cuttings, the environment plays a pivotal role. Ensure that your young plants have the right conditions for optimal growth:
Light Requirements: Place your cuttings in a spot that receives indirect sunlight. Japanese maples prefer bright, filtered light. Avoid direct sun, as it can be too harsh and scorch the delicate leaves. A shaded area in your garden or a greenhouse with dappled light can be ideal.
Temperature: Maintaining a consistent temperature is essential. Aim for a range of 70-75°F (21-24°C) during the day and slightly cooler at night. A stable, moderate climate is conducive to root development.
Humidity: Japanese maples thrive in high humidity environments. To maintain moisture levels, consider using a plastic dome or misting system to keep the air around the cuttings humid. This prevents excessive moisture loss and encourages healthy root growth.
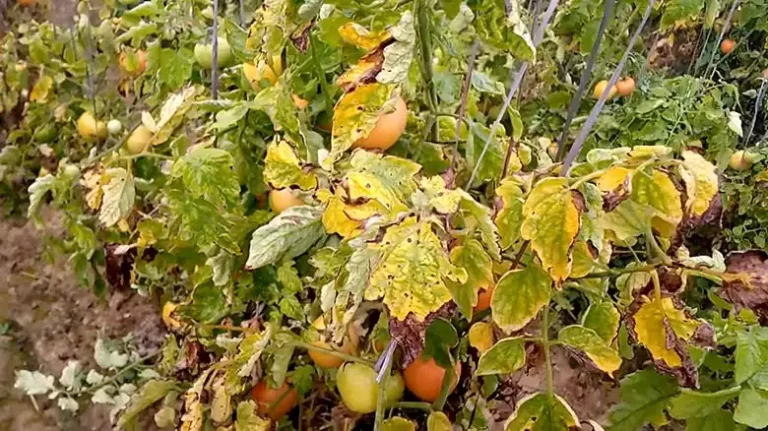
Disease and Pest Management
Just like any other plants, your Japanese maple cuttings may encounter issues related to pests and diseases. Here’s what you should watch for and how to address these concerns:
Powdery Mildew: Keep an eye out for any white, powdery growth on the leaves. If you notice this, make sure there’s adequate air circulation around your cuttings to reduce humidity levels, as powdery mildew thrives in damp conditions.
Aphids and Scale Insects: Regularly inspect your cuttings for these common pests, as they can harm the growth of your young trees. Early detection is key; apply organic or chemical treatments as needed to prevent further damage.
Fungal Diseases: Be on the lookout for fungal infections, like root rot, which can be treated with appropriate fungicides. Good ventilation and avoiding excessive moisture can also help prevent fungal issues.
Rooting Timeframes
The process of rooting your Japanese maple cuttings takes time, and it’s important to be patient. Keep an eye out for these signs of successful root development:
Visible Root Growth: After a few weeks, you may notice tiny white or brown roots emerging from the base of the cutting. This is a promising sign that the rooting process is underway.
Resistance to Tug: When you gently tug on a cutting, it should meet with some resistance. This indicates that roots are forming and anchoring the plant.
New Growth: As root development progresses, you may observe new leaves or buds sprouting from the cutting. This is a clear sign of successful propagation.
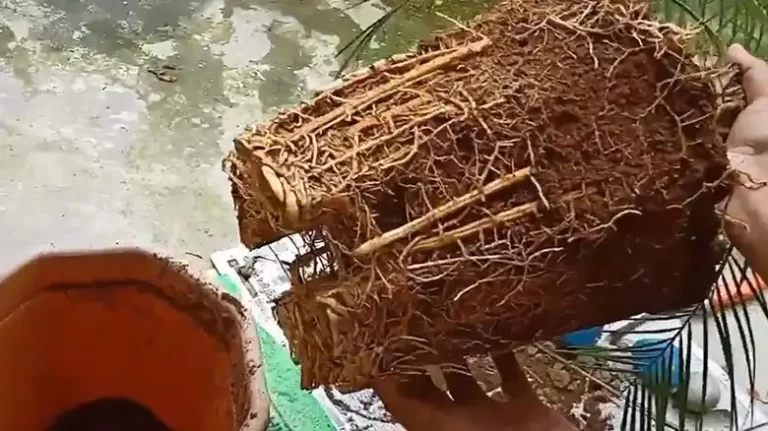
Transplanting Rooted Cuttings
Transplanting rooted cuttings is a crucial phase in the journey of propagating Japanese maples. Once your cuttings have developed healthy roots, it’s time to move them to their new permanent home.
This step is a culmination of your efforts, where your young maples make the transition from potted cuttings to flourishing trees in your garden. Here’s how to ensure a smooth and successful transplanting process:
Hardening Off
Before your cuttings are ready to embrace the great outdoors, they need a gradual introduction to their new environment. This period of adjustment is known as “hardening off.” By acclimating the cuttings to the elements, you help them prepare for life in the open.
Gradual Exposure
Start by placing your cuttings in a sheltered area with dappled sunlight. Shield them from strong winds and direct sun. Over the course of one to two weeks, gradually increase their exposure to the outdoor elements. This process toughens them up, so they can withstand the challenges of the garden.
Protecting Young Plants
During the hardening-off period, it’s essential to protect your young maples from potential hazards. Shield them from excessive heat by providing shade during the hottest parts of the day.
Be vigilant about sudden temperature drops, and cover them during unexpected frosts. Protect your young maples from pests, as well, since they may be more susceptible during this phase.
Choosing the Right Location
Selecting the ideal spot for your transplanted Japanese maples is key to their long-term well-being. The location you choose will greatly influence the future health and appearance of your maples.
Sunlight Preferences
Japanese maples thrive in environments with dappled or filtered sunlight. Full, scorching sun can lead to leaf scorch, so it’s best to avoid planting them in such conditions. Instead, opt for partial shade or areas where they’ll receive morning sun and afternoon shade. This balance is perfect for their delicate foliage.
Soil Type
Japanese maples prefer well-draining soil with a slightly acidic to neutral pH. If your soil doesn’t meet these criteria, you can amend it with organic matter to improve its quality and drainage. Good soil preparation is the foundation for a thriving maple tree.
Spacing Guidelines
Consider the mature size of your chosen Japanese maple variety when spacing the transplants. Smaller varieties can be planted closer together, while larger ones require more space to allow for their mature spread.
Proper spacing ensures that each tree can grow to its full potential without overcrowding or competition for resources.
Transplanting Process
Transplanting your rooted cuttings is a careful process that sets the stage for their growth into mature trees. Follow these steps to ensure the process goes smoothly:
Prepare the Planting Hole
Begin by digging a hole that’s twice the size of the root ball of your rooted cutting. It should be deep enough to accommodate the roots without bending or crowding them.
Gently Remove the Cutting
Handle the rooted cutting by the root ball to avoid damaging the delicate new roots. Carefully remove it from its container or propagation bed.
Plant at the Right Depth
Place the rooted cutting in the hole, ensuring that the soil level matches the level of the root ball. Backfill with soil and gently tamp it down to eliminate air pockets.
Water Thoroughly
After transplanting, give your newly planted maple a generous watering to settle the soil and ensure good root-to-soil contact. Adequate hydration is essential for the young tree’s success during its transition.
Mulch and Protect
Apply a layer of mulch around the base of the tree to conserve moisture and regulate soil temperature. A protective barrier, such as a tree guard or fence, can help shield the young tree from mechanical damage or disturbances.
Post-Transplant Care
Your responsibilities as a gardener don’t end with transplanting; they continue into the post-transplant care phase, where nurturing your maples is critical for their establishment and growth.
Watering
Proper watering is essential for the success of your newly transplanted Japanese maples. Ensure consistent moisture by following these guidelines:
Initial Watering
Immediately after transplanting, provide a thorough watering to help the roots establish contact with the surrounding soil. This sets the foundation for healthy growth.
Ongoing Watering
Throughout the first year, monitor soil moisture closely. Water as needed to maintain consistent moisture levels, ensuring the soil doesn’t become waterlogged. As the tree becomes more established, gradually reduce the frequency of watering.
Fertilization
Adequate nutrition is crucial for the growth and health of your Japanese maples. Follow these tips for successful fertilization:
Nutrient Needs
Choose a balanced, slow-release fertilizer suitable for ornamental trees. Follow the recommended application rates to avoid over-fertilization.
Timing and Frequency
Fertilize your maples in early spring, just as they break dormancy. You can consider a second application in late spring or early summer if necessary. Avoid fertilizing in late summer or fall to prevent stimulating new growth that may not have time to harden off before winter.
Pruning
Pruning plays a significant role in the care of your Japanese maples, helping to maintain their shape and structure. Here’s how to approach pruning:
Shaping Your Japanese Maple
Pruning is an artistic endeavor, and the goal is to enhance the natural beauty of your maple. Think about the desired shape and size, and prune accordingly.
Pruning Techniques
Use sharp, clean pruning tools to make precise cuts. Concentrate on removing dead or crossing branches, as well as any growth that detracts from the tree’s form. Pruning is your key to a well-groomed and healthy maple.
Recurring Questions
1. What is the best time to take cuttings from Japanese maples?
Answer: The best time to take cuttings from Japanese maples is typically in late spring or early summer. This is when the new growth is still relatively soft and conducive to rooting.
2. Do I need special tools for taking cuttings?
Answer: While special tools aren’t necessary, it’s recommended to use sharp and clean pruning shears or a knife for making clean cuts. Sterilizing your tools with rubbing alcohol helps prevent the spread of diseases.
3. What size should the cuttings be?
Answer: Cuttings should be around 4-6 inches in length, with at least two nodes (where leaves or buds are attached). This size is ideal for successful rooting.
4. Should I use rooting hormone when preparing cuttings?
Answer: While not mandatory, using a rooting hormone can increase the chances of successful rooting. Dip the cut end of the cutting in the hormone before planting.
5. How long does it take for cuttings to root?
Answer: The rooting time can vary, but it typically takes several weeks to a few months for cuttings to develop roots. Monitor for signs of successful rooting, such as visible root growth and resistance to gentle tugs.
6. What is the “hardening off” process, and why is it important?
Answer: Hardening off is the process of gradually acclimating your rooted cuttings to outdoor conditions. It’s important to help the young plants adjust to the elements and prevent shock when transplanting them into the garden.
7. Can I transplant my rooted cuttings directly into the garden?
Answer: It’s advisable to harden off your rooted cuttings before transplanting them into the garden. Gradually expose them to outdoor conditions over a week or two to ensure their successful transition.
8. What type of soil is best for planting Japanese maples?
Answer: Japanese maples prefer well-draining soil with a slightly acidic to neutral pH. Amending the soil with organic matter can improve its quality and drainage.
9. How often should I water newly transplanted Japanese maples?
Answer: Immediately after transplanting, give your maples a generous watering to settle the soil. For the first year, monitor soil moisture closely and water as needed to maintain consistent moisture levels. Gradually reduce the frequency as the trees become more established.
10. When and how should I prune my Japanese maples after transplanting?
Answer: You can begin shaping your Japanese maples through pruning after the first year. Use sharp, clean pruning tools and focus on removing dead or crossing branches, as well as any growth that detracts from the desired form.
Final Thoughts
Successfully propagating Japanese maples from cuttings is a satisfying and skillful horticultural endeavor. By carefully selecting the right variety, preparing your cuttings with precision, and providing attentive care throughout the process, you can watch your cuttings transform into healthy, flourishing trees.
![Dolphin Flower Plant [Total Care Guide]](https://www.daisynatives.com/wp-content/uploads/2023/12/Dolphin-Flower-Plant-768x431.webp)